SharePoint Online provides a plethora of templates for users to enhance their sites and make their experience more streamlined and personalized. With the modern interface in SharePoint, applying a site template is a simple process that can be done in just a few clicks.
Here’s how you can apply a site template in SharePoint Online.
Step 1: Set up your SharePoint site (if not already done)
- Access the start page in SharePoint Online.
- Click on the “Create Site” button.
- Select a site type (Communication site or Team site) that suits your needs.
- Enter a unique name and other necessary information for your site.
- Click “Finish” to complete the site creation.
Step 2: Choose a Site Template
Whether you have a new or existing site, you can choose a site template to apply:
- Once your site is created, navigate to it.
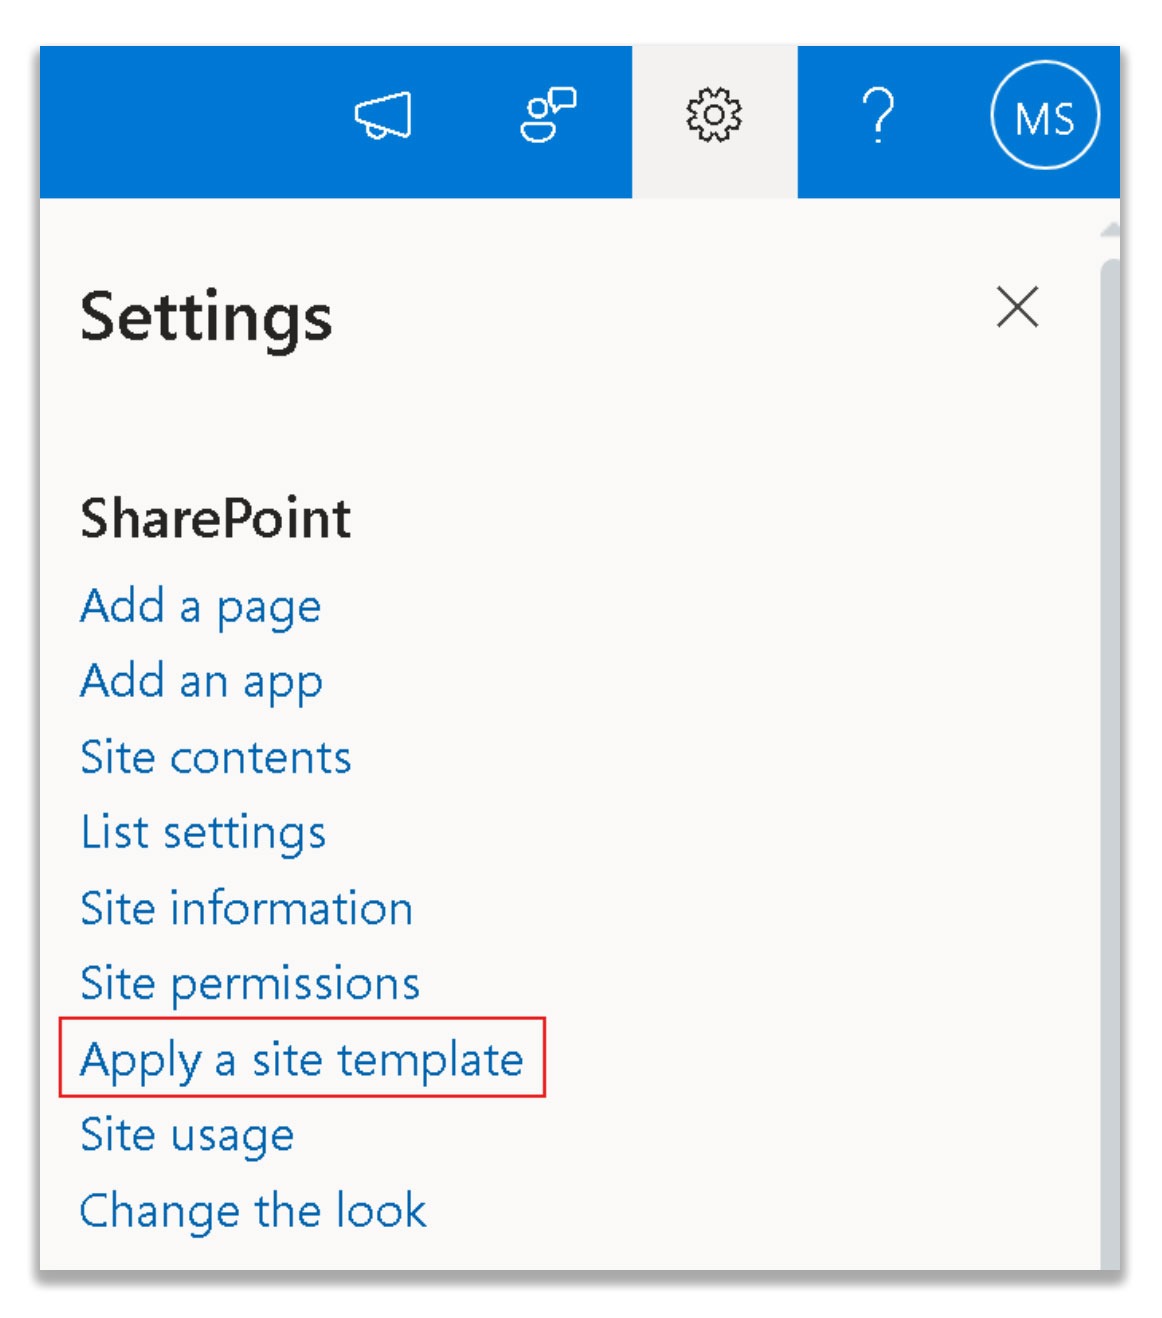
- Click on the settings icon (gear icon) in the upper-right corner.
- Select “Apply a site template” from the drop-down menu.
- In the preview window, browse the available templates from Microsoft.
- Choose the template that best fits your needs.
- Click “Use template” to apply it to your site.

Important Points to Note:
- Applying a site template will not overwrite or merge with existing content.
- Templates contain ready-to-use content, such as pages and lists. You can delete any unnecessary content from the new template.
- Modern Teams sites offer a different selection of design templates from Communication sites.
Step 3: Customizing the Site Template (if needed)
- Go to your site’s home page.
- Click on the “Edit” button in the upper right corner of the page to make changes.
- Customize the layout, add or remove web parts, and edit content as needed.
- Once satisfied with the changes, click “Republish” to save and make these changes visible to all users.
Note: The available design templates may vary depending on the type of site you create (either a Communication site or a Team site).
Saving Your Changes
Once you are satisfied with the changes you have made to the site template, click on the “Republish” button to save your changes. This will publish the updated template and make it visible to all users.
Note: The available site design templates in SharePoint may vary depending on the type of site you have. It is important to choose a template that best suits the purpose and needs of your site.
For communication sites, the templates include:
For team sites, the available templates include:
How to create custom site templates
To create a custom site template, you will need an advanced understanding of JSON.
-
- Site scripts provide instructions for SharePoint when creating new sites. With PowerShell and a JSON schema file as a reference, you can create the perfect script. Use a title, description, actions, and bindata to structure the file. Test and apply the script to your site collection using simple commands. This ensures consistency and customization for new sites to meet business needs.
$siteUrl = “https://contoso-admin.sharepoint.com” $credential = Get-Credential admin@contoso.com Connect-SPOService -Url $siteUrl -Credential $credentialAfter connecting the shell to your tenant, you can now create and assign the JSON.
Register the site script in SharePoint Run the code to add the site script to SharePoint; you will receive a site script ID.
- Create the custom site template.
Lastly, run the script and enter the site script ID to create the custom template.
Sample script:
$siteUrl = "https://contoso.sharepoint.com" Connect-SPOService -Url $siteUrl $site_script = '' Add-SPOSiteDesign -Title "Customer Tracking List Design" -Description "Site design for creating a list to track customers and orders" -WebTemplate "64" -SiteScripts $site_script -PreviewImageUrl "https://contoso.sharepoint.com/SiteAssets/TrackingListPreviewImage.jpg"
Author: Michael Shipman


